So, how do you upload your WhatsApp photos to Google Photos? Not only is uploading your photos to Google Photos a great way to create a backup of your important memories, but it can also help you better organize and access your photos.
Whether you want to free up storage on your phone or a more convenient way to view and share your photos, this tutorial will walk you through the process of getting your WhatsApp photos onto Google Photos. So let’s gеt started!
Setting up Google Photos
Setting up Google Photos is thе first step in uploading your WhatsApp photos. Here’s how to do it:
- First, download the Google Photos app on your phone if you don’t already have it. You can find it in the App Store or Google Play Store.
- Open the app and sign in with your Google account. If you don’t already have a Google account, you can create one for free.
- Once you’re signed in, the app will prompt you to turn on backup. Enable this feature to allow the app to automatically upload your photos and videos to your Google Photos library. You can choose to back up over WiFi only or use your mobile data.
- You can also customize the backup settings to your liking. For example, you can only back up high-quality photos (free up to 15 GB) or original quality (available with a Google One subscription). You can also choose to exclude certain folders from the backup.
Following these steps, you’ll have Google Photos set up and ready for the next step: exporting your WhatsApp photos.
Exporting WhatsApp photos
Now that you’ve set up Google Photos, it’s time to export your WhatsApp photos so that you can import them into the app. Here’s how to do it:
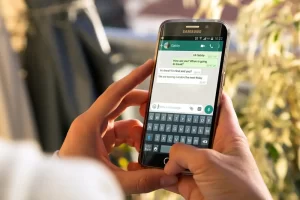
- Open WhatsApp and go to the chat or group where the photos you want to export are located.
- Tap on the photo you want to export. If you want to export multiple photos, hold down on a photo and then tap on any additional photos to select them.
- Once you’ve selected the photos you want to export, tap on the “Export” button (this button may be labeled “Share” or have a similar icon depending on your device).
- A menu will appear with various options for sharing the photos. Tap on “Save to Gallery” or “Save to Camera Roll” (the exact wording may vary depending on your device). This will save the photos to your device’s photo library.
- Repeat these steps for any additional photos you want to export.
Now that you’ve exported your WhatsApp photos tо your device’s photo library, you can import them into Google Photos.
Importing photos to Google Photos
Importing your WhatsApp photos into Google Photos is easy once you’ve exported them to your device’s photo library. Here’s how to do it:
- Open the Google Photos app on your device.
- Tap on the “+” icon in the bottom center of the screen.
- Tap on “Select from device” or “Import from Device” (the exact wording may vary depending on your device).
- Select the photos you want to import by tapping on them. You can also select multiple photos by holding down on a photo and then tapping on any additional photos.
- Once you’ve selected the photos you want to import, tap on the “Import” or “Open” button (the exact wording may vary depending on your device).
- The selected photos will begin uploading to your Google Photos library. You can check the progress of the upload by tapping on the “Backup & sync” icon in the top right corner of the app.
That’s it! You’ve successfully imported your WhatsApp photos into Google Photos. You can now view, organize, and share them like аny other library photos.
Finishing touches
Here are some finishing touches to consider after importing your WhatsApp photos into Google Photos:
- Consider deleting the photos from your device’s photo library to save storage space. To do this, go to your device’s photo library and select the photos you want to delete. Tap the “Delete” button (the exact wording and icon may vary depending on your device).
- If you have a Google One subscription, you can store your photos in original quality instead of high quality. This will give you a higher-resolution version of your photos and increase your storage quota. To change this setting, go to the “Backup & sync” settings in the Google Photos app and toggle the “Original quality” option.
- You can also use the Google Photos app to organize and edit your photos. You can create albums, add labels and captions, and use editing tools to enhance your photos.
- Share your photos with friends and family! You can share individual photos or albums with others with а Google account. Select the photos you want to share, tap on the “Share” button, and enter the email address or phone number of the person you want to share with.
That’s it! You now know how to upload your WhatsApp photos to Google Photos. We hope this tutorial was helpful and that you’ll enjoy all the benefits of having your photos backed up аnd organized in Google Photos.
Conclusion
Uploading your WhatsApp photos to Google Photos is a simple process that can provide numerous benefits. Not only does it create a backup of your important memories, but it also allows you to organize better and access your photos.
So, whether you want to free up storage on your phone or want a more convenient way to view and share your photos, we hope this tutorial has helped you learn how to upload your WhatsApp photos to Google Photos.